Friday, March 18, 2016

These are the boards this year ...


Share/Bookmark
My experience building a longboard provided me with the opportunity to be creative, to problem-solve and to have fun! Not only was I able to exercise my skillz as an engineer, but also as an artist. My approach stayed true to the long boarding mindset--go with the flow and have a chill time. There was trial and error throughout the process, but errors became happy accidents that only added to the board's character. When I take the time to bevel the wrong edge, its no biggie, I'll just bevel both edges and make it a surfboard. But these adjustments were made in every step of the way. I love the old school 70's style of skateboarding so much it seemed to just bleed into my board. Its retro style will never falter and age will only add to its beauty. I will definitely be back to make more!
Pat

Share/Bookmark
I started the week with a pretty ugly piece of wood and really thought it was not going to look great. But as the week went on the board got better and better. It was a real experience because we can see now that you can build your own board and not have to buy it. I am just in the end very happy with the end product of my board and think it looks great. We rode it around the back of the school and around the streets of Hanover. It rode great for something that was a block of wood a few days ago.
Clayton

Share/Bookmark
Today, as I looked back on this march intensive, I realized a few things.  This march intensive showed me the power of DIY.  Instead of wondering about how I would keep skateboarding, I started wondering about how I would access a wood shop.  If I have a new idea for a board,  I can just make one.  In addition to this new found power, I also think I have found a new hobby.  Today was the second time I rode my longboard, and I think I will spend my summer on it.  
Tim

Share/Bookmark

Today I finished coating my board and now I have to put grip tape on it.  I really like how the wood looks though and because the clear grip tape isn’t very clear I decided I want to use white sand as my grip.  Yesterday, me and a friend went to look for some sand but couldn’t find any so today the search is back on.  Once I hopefully have the sand, I am planning on layering it onto the board very thinly and covering it with a coat of sealant.  I’m hoping that the sand will let the wood show through easily.  By the end of the day, I hope I am able to ride around the parking lot and have some fun. 
Mahler

Share/Bookmark
My boards all done and I'm pretty proud of it. It definently looks much different from how I imagined, but I think I like

it more then I would've liked my first design. It felt really good to build something, I haven't built something in a long time and it's nice to have a final product from your work, especially one that unique to you. I'm excited to have a board, I doubt I'll be going 60 miles per hour down hills, but this summer I hope to ride in town with my friends. If I have enough confidence, I'm sure this board will be by my side while I'm at college getting to classes and stuff. I'm excited to also just have another fun thing to do while I'm home this summer, the ability to just coast around during an afternoon sounds awesome. I think I've made my mum proud with the board, now I just have to get good at riding it.
Alma

Share/Bookmark
Today we had a talk on concussions and the importance of wearing helmets. After this we are going outside to ride our finished longboards. I am very happy on how mine came out. I was skeptical about the boards at the beginning of the class but they have turned out very cool. over all this week has been very educational  and fun. My favorite part this week was the painting part, I was able to do what ever I wanted to personalize are boards.  
Kyle

Share/Bookmark

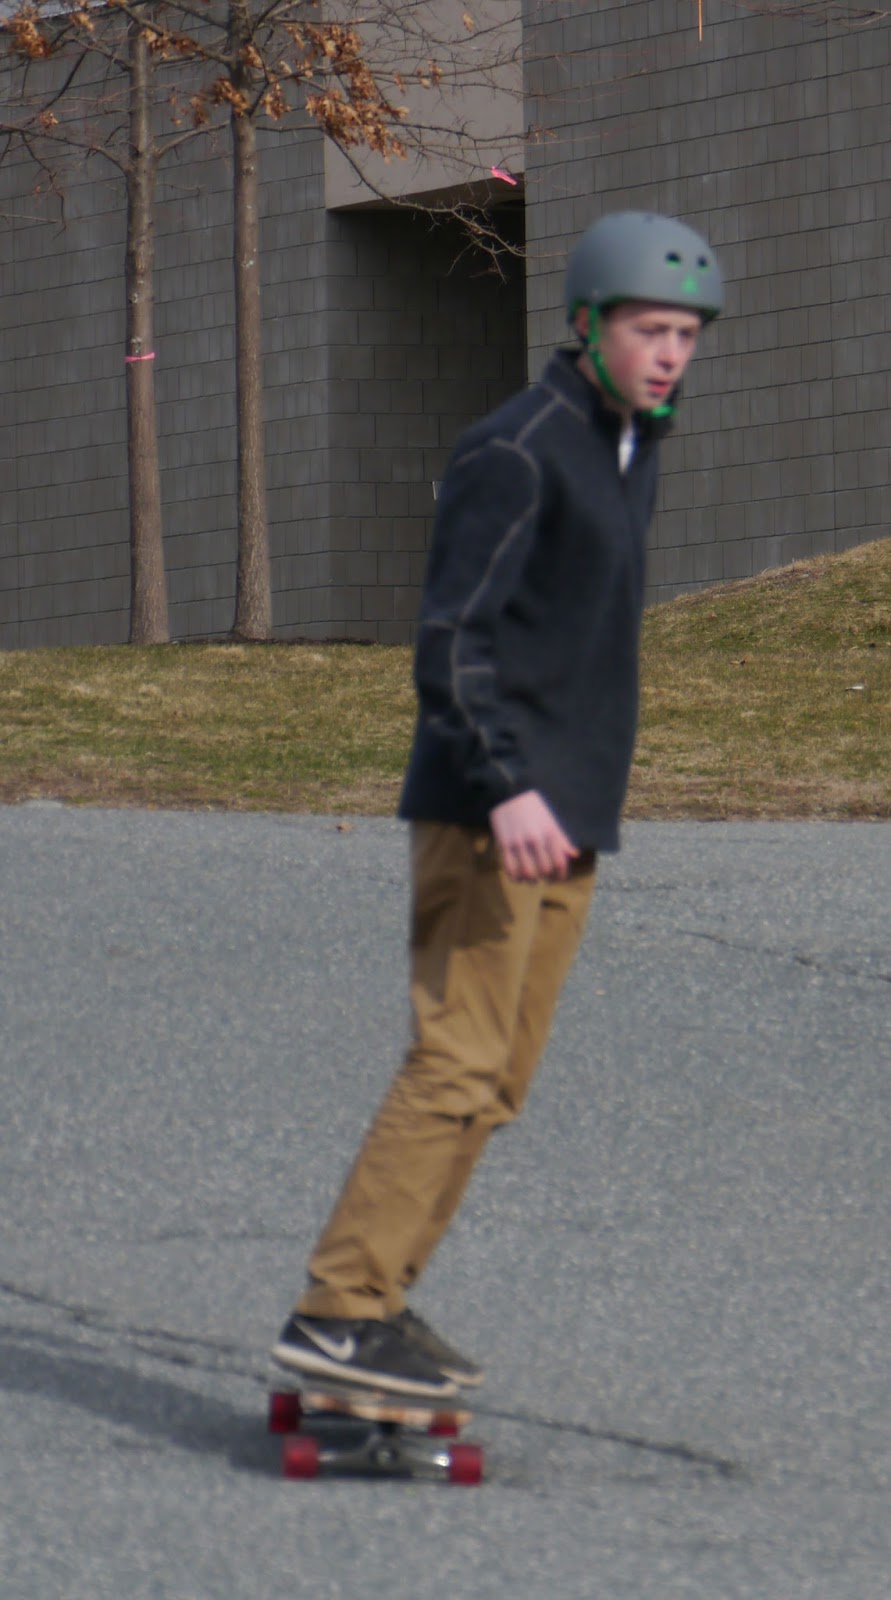
My board is finally finished and it looks amazing. I showed a couple of my friends pictures of it and they said it looked super sweet. Overall this MI was an amazing experience. It was my first time in the workshop, using all of these tools, and getting to learn a lot about skateboards. We didn’t just put them together; we dug deep into how the trucks worked, how to maintain our board, and how to adjust it to get the ride we wanted. What it really comes down to it, it’s that we created something that we can use everyday and can be proud of. All it is is just a plank of wood, and we can sand it down, start over, readjust it, repaint it, and make it into an even better board. The possibilities are almost endless. All I wanted was a longboard that was more than just a board I bought from some skate shop online, but I think in many ways I got way more than just that out of this MI.
Pierre

Share/Bookmark


The Longboard Collective was an awesome way to spend the week. I learned a lot about about longboard creation and the freedom in the creative and building process. I am more confident in my ability to make a longboard. At the beginning of the week the process seemed daunting, but I had most of the skills already. Cutting and shaping a board, making stencils, operating basic tools and machines, painting, cutting grip tape. I learned new skills as well especially about trucks and wheels, but the process was surprisingly doable. I’m also very happy with my board, I think it looks really nice and from the riding I’ve done so far it feels good. The one thing I wish I had done better would have been to make sure the ends were symmetrical and straight, when I went to thin the ends to avoid wheel bite I wasn’t as precise duplicating what I did one part to the other. Overall I had a lot of fun this week.

Peter

Share/Bookmark
The long boarding March Intensive is almost over and I have had a fantastic time. I have had more fun than I could have imagined and any doubts I had previous to this week have disappeared. The freedom we were given to create any type of board we wanted is what made this so fun. Each person has a different board shape and a different design. Some people's creativity is unbelievable. My board turned out a little different than expected. I decided to cover the entire top with  grip tape instead of leaving two silver stripes. Although it isn't what I expected, my board still looks great and I can't wait to ride it. Thank you especially to Wayne, and all the other teachers, for their willingness to help the students create their dream boards. I would highly recommend this March Intensive to everyone. 
Asa

Share/Bookmark
Throughout this week we have been able to make longboards that I believe we can all be proud of. Before this began, I knew I wanted to make a board that was smaller than what I already had, and I really just wanted to have fun with making it. This whole week has been really fun and rewarding just because I can ride and enjoy something that I made, and it is nice to see that all of my hard work has paid off. It was really cool to be able to have so much freedom with making the boards, just being able to do whatever we wanted with the shape, graphic, grip tape, etc. It is also good to have some more experience working with the tools and materials we used to make our boards. 
Sander

Share/Bookmark
My longboard came out the way I wanted, but with some trial and error along the way. I had to paint my board a few times to get what I wanted. My first design was a batman symbol with red paint splattered on it. But the white paint that I used for the symbol got under the paper I was using for my stencil so the paint dripped a little. I decided to sand it down and start again with a black coating. I made my board half gold, half silver and a black stripe down the center. And I still have to sand my board down and repaint it again to make the paint stick. But the boards look awesome and the parts on them just complete it. I haven't ridden my board yet because of my lack of a helmet. I brought mine from home for today. So hopefully we'll be able to get out and do some long boarding. Also the brands associated with our boards are phenomenal for allowing us to have these parts and really experience what it's like to longboard. Thanks!
Damien

Share/Bookmark
This was an awesome experience. I was realizing last night that, being a performance kid, I've never taken an art or shop class. All the creative stuff I do isn't lasting, it's ephemeral. The reason this March Intensive was so fun and interesting for me was the fact that I have something, a physical object, that represents all the work I put in these four days, and its something I'm really proud of. I'm also extremely excited to learn how to ride. It seems like the perfect blend of relaxed and efficient transport, that also looks damn cool when you're doing it. I can't wait to take Bernie out on the road this summer, and I'm so glad I got to work with all these people who are passionate about the sport.
Ross

Share/Bookmark

Day 4 - Finishing up and the beginning of riding the new boards.


Share/Bookmark

At the end of day 3, most of the boards were about to be ready for their first ride. Great group, fantastic progress in three days.


Share/Bookmark
Today was a great day of painting and finishing up my board. It came out well and looked great. I was especially happy with my long board because I'm familiar with some of the companies associated with the parts we used. Bones skating is a company I often buy my own bearings from when I need them for my scooter. So when I saw that we had them for our long boards I was happy because I knew that we were gonna have quality bearings for our boards.
Damien

Share/Bookmark
Today I Finished my longboard. I polyurethaned it, made a bumpin’ design out of the grip tape, and attached wheels onto it. I flashed some natural wood just to arouse the crowd that the longboard is homemade. I kept having to tighten the trucks to make it less wobbly when I gain speed. It felt natural going down hills and riding on it. I am very pleased with the results and the expansion of knowledge this course has given me. Amen.
Nic

Share/Bookmark
Today we put our trucks, wheels, and bearings together and put them on our boards. Today was also the first time we were able to ride them outside. It was really cool and rewarding to be able to have so much fun and enjoyment from something we made. Hopefully it stays nice tomorrow so we can spend the whole day outside, just riding our boards.
Sander


Share/Bookmark

Thursday, March 17, 2016


Thanks, Wayne, for being part of the Longboard Collective this year again. Your expertise and your love to work with students makes a difference and adds to the quality of this workshop.


Share/Bookmark
Today was the day when I finally got to put together and ride my longboard!  The whole design looks great.  My first challenge of the day was figuring out the griptape design.  I decided to use a brick-like design that is reminiscent of the wall on the bottom of the board.  This ties the whole board together, and looks great!  I also started painting my helmet.  I am planning on doing a mystery machine design, but that will take a while because it has many layers.  I am almost glad the helmet contest got moved to next week.
Tim

Share/Bookmark
I finished up the clear on my board this morning and I assembled by trucks and wheels in between dry times. Afterwards I began working on my grip tape, I chose a silhouette of some mountains and black grip tape. I took a little while to cut out, I had to go over it a few times with a box cutter, but luckily all of the lines were straight, so it turned out pretty nice. I hope to get my board fully assembled by the end of the day, I’m happy with the way things are turning out.
Peter

Share/Bookmark
First thing I did today was put on my final coats of polyurethane. Next I figured out how I wanted my grip tape to look and layered out the design piece from piece. I achieved what I wanted, which was to show parts of teh stained wood through the grip tape on the top. The top of the board looks way better then i imagined it would come out, and the whole thing (with bottom and top designs) comes together pretty well. I also put together the trucks this morning, meaning the only left to do it put them on after lunch and it'll be done. I was very surprised at how quick the whole process was. 
Alma

Share/Bookmark
I started working on the grip tape today. I decided that I would first cover the board in solid red then I cut out a black Stewie silhouette  to go on top of that. I also decided to sand out one of the graphics I had done so I had to redo the clear coat on that portion. 
Kate

Share/Bookmark
Today is Day 3 and the fun has continued. Today we are putting the final touches on our graphics by putting layers of clear coat on them. Some students are cutting out designs for grip tape but I am not there yet. I'm still waiting for my layers of clear coat to dry so i can sand them off and make my board look nice. This day has involved the most waiting, but its no problem as people are still having fun. Hopefully if the weather is nice tomorrow we can put our trucks on and ride outside.
Asa

Share/Bookmark
Day three we started the finishing touches to our decks. We started covering the decks in polycrylic paint to protect the board. After we began cutting and adding griptape to the boards, we had several colors to work with for griptape; red, purple, black, and clear. I wasn’t able to start adding my griptape in the first half of the day because I had to redo several layers of paint that got smudged by my first layer of polyacrylics. Later in the day when the board is dry my griptape will be added and I’ll be ready to add my trucks and wheels. 
Cam

Share/Bookmark
When I came in this morning I couldn’t wait to take the tape off of my board to check out how my stripes came out. They looked super nice, and I love how the stripes of bare wood in between them compliment the paint. I put my trucks and wheels together as well and I’m planning on getting my griptape on before the end of the day so that we can ride tomorrow. That’s really what I’m looking forward to. Hopefully my board goes straight… 
Pierre

Share/Bookmark
Today in Casa we worked on laying down are grip tape. We cut the tape to size, layed it down on the board and made sure there was no air bubbles. After we filed down the sides with a screw driver and cut the tape the the shape of the board.
Kyle

Share/Bookmark
Today I am catching up because I was out sick yesterday.  I am feeling better now and I started on the staining of my board and it looks amazing.  I’m still trying to research and decide what small graphic I want to put on the bottom of the back of the board.  I’m thinking maybe a little mountain range or some sort of cartoon/political figure.  As of now, I am waiting for the stain to fully sink into the board and then I will proceed with either taping and spray painting or making a small graphic. 
Mahler

Share/Bookmark
Today was all about getting the polyurethane on. The stencil didn't come out as clean as I'd hoped, but seeing as bernie's hair is supposed to be crazy, I left it, and I think I really like how rough it is. So I'm two coats into the process of putting on the cover, so we'll see how it goes from here. I'm still leaning towards a very simple grip tape pattern, with just showing a stripe of the wood, and keeping with the black grip, but we'll see how that works out.
Ross

Share/Bookmark
This year's group, half way through day 3 (except for Pat whose still catching up ;-).


Share/Bookmark
Look at these boards at the end of day two.


Share/Bookmark
Today was especially fun. Being able to create the designs and then paint our boards was awesome. All of the boards look greatso far and and they are going to be awesome rides.
Damien

Share/Bookmark
Today in the Longboard Collective we worked on painting our boards. The only obstacles we had to overcome were to make sure our colors had sharp lines and did not mix. Overall we had a very fun day and learned a lot about paint and the effects it has on longboards. 
Kyle

Share/Bookmark
Today, I completed my design on my board. I decided to do a black outline of Peter Griffin and Homer Simpson on the back. I liked the look of the bare wood so I decided to leave most of the wood exposed on the board and today I also finished putting the clear coat on the board. I also decided to paint my helmet like a galaxy and tomorrow I will work on putting a Roger the Alien on it as well to keep the cartoon motif going. 
Kate

Share/Bookmark
Today we started graphics on both sides of the deck. I only finished one side of the deck but I am happy with the look. I didn’t do much on the bottom side of the deck because the gradient of the wood looks good by itself. So, I put an H on the bottom and left it just like that in hopes that the hint of color would look nice with the wood gradient. 
Cam

Share/Bookmark

Today we worked on graphics, and I was originally planning to draw a lobster on the bottom of my deck, but I soon realized how boring a choice that would have been. Because of this, I decided to just go for it and draw whatever popped into my mind. I wanted to make my board colorful and amusing to look at, and I think I did.
Sander

Share/Bookmark

Today was graphics day so most of the day was spent painting and drawing out designs. I changed my design idea many times, but luckily landed on a final one early enough in the day. Staining the wood created a really nice looking board and I'm glad I decided to do it. After lunch, I used some grafit paper to get a faint outline of my drawing onto my board and finished up the design aspect. It's basically a blank board, but with one little drawing I think I achieved what I wanted it to look like. Next is the polyurethane finish and then grip tape. 
Alma

Share/Bookmark

Today we worked on graphics. I originally wanted to do an octopus wrapped around and anchor, but the design I wanted to do wouldn’t looked good in sharpie and wouldn’t make a stencil. Instead I decided to do a stencil of Banksy’s “Guy throwing Flowers” I think the image is powerful and it would look good a board. The stencil was detailed so it took a while to cut out, but the end result was satisfying. I was concerned that because of the small elements of the design the spray paint might bleed under the edge, but by using double-sided tape I was able to minimize the effect.  I went in after and used colored sharpie to do the flowers in the bouquet, from afar it looks fine, up close it is a bit sloppy. I finished up the day putting on some coats of clear, I am really liking the way the board is turning out.
Peter 


Share/Bookmark